How to Create Your Own Barcodes
See how easy it is to create barcode labels with Avery Design & Print and our free barcode generator. Whether you're using our professional printing service Avery WePrint, or you're printing your own labels using our blank labels by the sheet or our retail label packs you can easily make your own barcode labels online following the step-by-step below.

Step 1: Go to Avery Design & Print
Open the free Avery Design & Print software. To start a new project, click Start Designing. If you are printing your labels yourself, enter the Avery product number from your packaging and click Select this Template.
Step 2: Choose your design
Use the menu on the left to browse design categories, or select a blank template to upload your own artwork or image.
Step 3: Add barcode
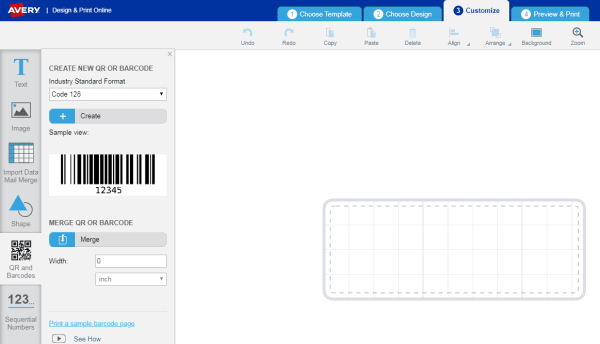
Select More in the menu on the left, then click QR and Barcodes. Use the drop-down menu to choose the format and code type. When you’re done, click Merge.

Step 4: Set up your barcodes
A pop-up window will appear. You can choose to import your barcode data from a spreadsheet, add sequential numbering or type in a specific barcode. The sample view will show you what your barcode will look like. Click the circular arrow button to refresh the view image after entering your information.
When you’re done, click Finish.
Step 5: Test your barcode
Use a barcode scanner to test the barcode on your screen to make sure it works appropriately. Click Preview & Print when you’re ready to review.
Step 6: Choose your printing option
Select Print It Yourself if you're using your own printer. Choose Let Us Print for You to have Avery WePrint, our professional printing service, print your barcode labels for you.
After selecting your printing option, you will be able to save your barcode labels in your Avery account or on your own computer.